Vuetify is a Vue UI material library that helps you to create attractive applications with no designing skills required. Installing Vuetify in direct Vue application is easy but installing in the Laravel framework is a headache. In this chapter, you will learn how to install Vuetify in Laravel.
Post Contents
# Installing Laravel
Let’s install laravel with the following command and configure the database in .env file.
composer create-project --prefer-dist laravel/laravel laravel-vuetify "7.0"/* .env */
DB_CONNECTION=mysql
DB_HOST=127.0.0.1
DB_PORT=3306
DB_DATABASE=laravel_vuetify
DB_USERNAME=root
DB_PASSWORD=After that, start the development server with the following command. It will start the development server at localhost:8000.
php artisan serve# Scaffolding Frontend
I’m using laravel 7 for the entire article, but you can use any version greater than 5.3. Frontend scaffolding functionality changes when laravel version 6 is released. Its requires laravel/ui package and ui vue artisan command. But if you are using a laravel version below than 6 then it’s very easy to scaffold frontend.
To check how to scaffold the frontend for another Laravel version click here and select a particular version from the top. All of the functionality will remain the same.
Use the following commands to scaffold frontend. If you are using laravel version below than 6 then you don’t need to use laravel/ui package and ui vue artisan command.
composer require laravel/ui
php artisan ui vue
Now install the frontend dependencies with the following commands.
npm install
npm run watch
# Installing Vuetify
To install Vuetify in this project we need to install some dependencies along with Vuetify.
npm install vuetify
npm install sass sass-loader fibers deepmerge -D
Also, we need to vue-router package to navigate to our application.
npm install vue-routerVuetify uses Google Roboto Fonts and Material Design Icons. So wee needs to use both CDN to welcome.blade.php. Also, welcome.blade.php contains app-init component, but we will discuss it later. For now, replace the whole code in the file.
/* resources > views > welcome.blade.php */

<!doctype html>
<html lang="en">
<head>
    <meta charset="UTF-8">
    <meta name="viewport"
          content="width=device-width, user-scalable=no, initial-scale=1.0, maximum-scale=1.0, minimum-scale=1.0">
    <meta http-equiv="X-UA-Compatible" content="ie=edge">
    <title>Install Vuetify In Laravel</title>
    <link href="https://fonts.googleapis.com/css?family=Roboto:100,300,400,500,700,900" rel="stylesheet">
    <link href="https://cdn.jsdelivr.net/npm/@mdi/font@5.x/css/materialdesignicons.min.css" rel="stylesheet">
</head>
<body>

<div id="app">
    <app-init></app-init>
</div>

<script src="{{ mix('js/app.js') }}"></script>
</body>
</html>
Next open web.php file and create following path.
/* routes > web.php */

Route::get('/{any}', function () {
    return view('welcome');
})->where('any', '.*');
Now, replace code into app.js in the resources folder. That file contains, app-init component as default to the main entry point for the Vue application. In the same vein, I imported vue-router and vuetify package. After that, I created two routes with vue-router along with two components, which will be created later. In last, two instances for the router and vuetify are injected in vue object.
/* resources > js > app.js */

require('./bootstrap');

window.Vue = require('vue');

Vue.component('app-init', require('./AppInit.vue').default);

import VueRouter from 'vue-router'
Vue.use(VueRouter)

import Vuetify from 'vuetify'
import 'vuetify/dist/vuetify.min.css'
Vue.use(Vuetify)


import Dashboard from './views/Dashboard'
import Products from './views/Products'

const router = new VueRouter({
    mode: 'history',
    routes: [
        {
            path: '/',
            name: 'dashboard',
            component: Dashboard
        },
        {
            path: '/products',
            name: 'products',
            component: Products,
        }
    ],
});

const app = new Vue({
    el: '#app',
    router,
    vuetify: new Vuetify(),
});
So, this is it for configuration, that’s how we install Vuetify into laravel. Next, let’s use Vuetify into the project.
# Using Vuetify
First of all, create AppInit.vue file into resources > js folder. Of course, you can either create it into the components folder or you can create a new folder but its an entry point of our application so I’ll create it into resources > js root folder.
Vuetify provides lots of pre-made layouts. I personally like the dark layout but you can use any of it. Just visit here and copy any of the layouts code and paste it into AppInit.vue file. But remember, I made some changes to that page like added routing links and router views. So, it’s recommended to use the following code for now. Update AppInit.vue file as below.
/* resources > js > AppInit.vue */

<template>
    <v-app id="inspire">
        <v-navigation-drawer
            v-model="drawer"
            app
            clipped
        >
            <v-list dense>
                <v-list-item link to="/">
                    <v-list-item-action>
                        <v-icon>mdi-view-dashboard</v-icon>
                    </v-list-item-action>
                    <v-list-item-content>
                        <v-list-item-title>Dashboard</v-list-item-title>
                    </v-list-item-content>
                </v-list-item>
                <v-list-item link to="/products">
                    <v-list-item-action>
                        <v-icon>mdi-buffer</v-icon>
                    </v-list-item-action>
                    <v-list-item-content>
                        <v-list-item-title>Products</v-list-item-title>
                    </v-list-item-content>
                </v-list-item>
            </v-list>
        </v-navigation-drawer>

        <v-app-bar
            app
            clipped-left
        >
            <v-app-bar-nav-icon @click.stop="drawer = !drawer"></v-app-bar-nav-icon>
            <v-toolbar-title>Application</v-toolbar-title>
        </v-app-bar>

        <v-main>
            <v-container>
                <router-view></router-view>
            </v-container>
        </v-main>

        <v-footer app>
            <span>© {{ new Date().getFullYear() }}</span>
        </v-footer>
    </v-app>
</template>

<script>
    export default {
        props: {
            source: String,
        },
        data: () => ({
            drawer: null,
        }),
        created () {
            this.$vuetify.theme.dark = true
        },
    }
</script>
In AppInit.vue file you can see I’ve added two links into v-list-item tag for routing in "/" page and "/products" page. Also, I’ve added router-view component, so it will render the pages dynamically when we navigate to other pages.
On the other hand, let’s create two pages to navigate and understand how vue-router and Vuetify work together. Let’s create folder views inside resources > js and create two components Dashboard.vue and Products.vue inside the resources > js > views folder.
Update following codes to both files.
/* resources > js > views > Dashboard.vue */

<template>
    <div class="container">
        <div class="row justify-content-center">
            <div class="col-md-12">
                <div class="card">
                    <div class="card-header">{{ header }}</div>

                    <div class="card-body">
                        I'm dashboard page.
                    </div>
                </div>
            </div>
        </div>
    </div>
</template>

<script>
    export default {
        data() {
            return {
                'header': 'Dashboard'
            }
        }
    }
</script>
/* resources > js > views > Products.vue */
<template>
<v-simple-table>
<template v-slot:default>
<thead>
<tr>
<th class="text-left">Name</th>
<th class="text-left">Price</th>
</tr>
</thead>
<tbody>
<tr v-for="product in products" :key="product.name">
<td>{{ product.name }}</td>
<td>{{ product.price }}</td>
</tr>
</tbody>
</template>
</v-simple-table>
</template>
<script>
export default {
data() {
return {
'header': 'Products',
'products': [
{'name': 'Product 1', 'price': 10},
{'name': 'Product 2', 'price': 20},
{'name': 'Product 3', 'price': 30},
]
}
}
}
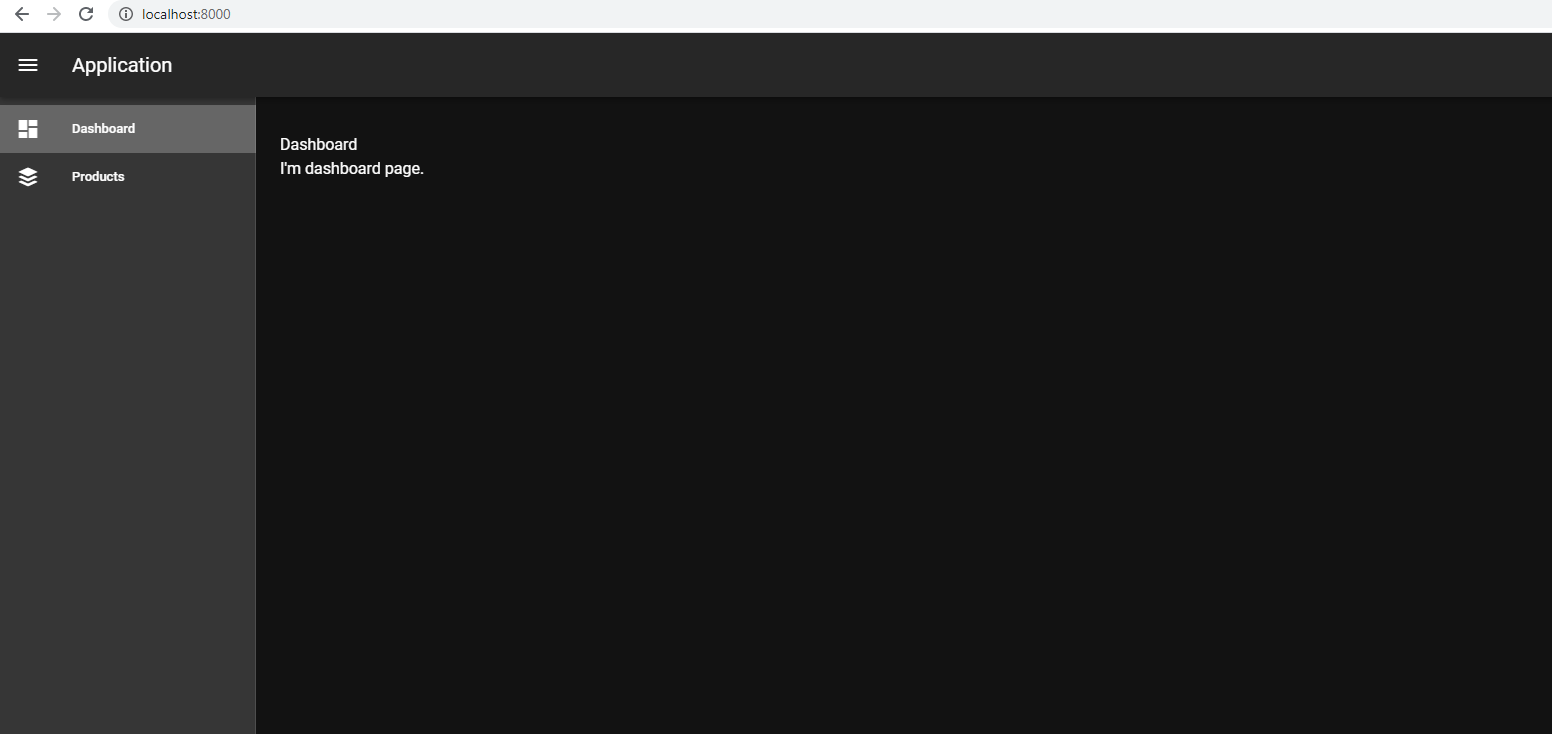
</script>Now navigate to localhost:8000 and you will see following screen. I Used table components in products page from Vuetify to let you understand how to use it. Explore all Vuetify Components.


Thankyou very much now, I know a little about laravel vuetify.